Tuesday, April 30, 2013

Comparing Fractions with Fourth and Fifth Graders

One of the biggest changes for my school as we move toward the Common Core is that we have a lot more work to do with fractions in fourth and fifth grade.  I have been working with a mixed group of fourth and fifth graders on comparing fractions recently.  Here is what the common core says in regards to comparing fractions at grade 4:

CCSS.Math.Content.4.NF.A.2 Compare two fractions with different numerators and different denominators, e.g., by creating common denominators or numerators, or by comparing to a benchmark fraction such as 1/2. Recognize that comparisons are valid only when the two fractions refer to the same whole. Record the results of comparisons with symbols >, =, or <, and justify the conclusions, e.g., by using a visual fraction model.

I created this little fraction compare worksheet and chose fractions that I thought would elicit some of the different strategies suggested by the Common Core


Yes this is the entire thing!!!! I really wanted to focus on strategies used to compare these fractions.  Let's look at some of the strategies my students used for each one.  It is simple, but very effective!  I have made it available for free for anyone who wants to try it!  Click here to grab a copy!

The first one is 3/16 and 3/15

This questions is obviously written to illicit ideas about common numerators.  We spend so much time on common denominators that sometimes common numerators get completely ignored!

The majority of my students used unit fraction reasoning on this one.  They reasoned that we had 3 pieces for each one and since fifteenths are larger than sixteenths, 3/15 would be larger than 3/16.

A few of my students tried drawing a model for this.  Because these fractions are really close, it was hard to tell from their models which was larger because of the inherent margin of error with drawing models.  Model drawing is an important first step for kids who are still working on developing conceptual understandings of fractions.  It is not where I want to leave students at the end of grade 5, but it is an important first step!

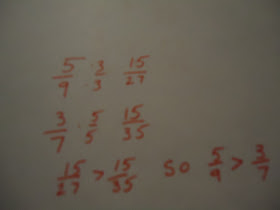
Let's look at 5/9 and 3/7

The strategy I was trying to elicit with this one was comparing to the benchmark of 1/2.  Here are the four strategies used by my group to compare these fractions

Here was the strategy I was thinking of when I wrote the problem.  This student compared both fractions to the benchmark of 1/2.  Since one fraction is just  below 1/2 and the other just above it, this is a great strategy for this problem.

This student drew a model.  As far as model drawing goes, this is fairly good.  This can not be the only strategy kids use to compare fractions but it is a great place to start and really helps build conceptual understanding of fractions. 

This student used a common denominator strategy to compare the fractions.  Common denominators will of course be something you want your fifth graders to be solid on, but please remember that it isn't the ONLY was to compare fractions and often times it is not the most efficient way.

This student surprised me by using a common numerator strategy.  It is actually very efficient for this problem.  I didn't write the problem purposely to illicit this strategy but it works quite well.

How about 5/6 and 7/8?

 
This student used reasoning about how far away from 1 these fractions are.  They used what they know about unit fractions to help them with this comparison.

This student used a number line model to compare the fractions.  If you look closely, you will see the partitioning done in red was done to make sixths and the darker color was used to make eighths.  The number line is a model that I have found really effective for helping kids move forward with conceptual understanding around fractions.

The Last One


I chose this problem because it was really easy to create a common numerator for these numbers.  That is what this student did and it was very effective and efficient!
This student used a common denominator strategy to compare these two fractions.  You can see that in this case it is much less efficient than finding a common numerator. 


This took an entire class period but I got such great ideas and strategies out of the students.  I love days like this when kids have a lot of time to share strategies!

A GREAT resource if you want to really help your kids excel with fractions is this book A Focus on Fractions.  Reading it completely changed the way I thought about teaching fractions in grades 1-6.


What strategies do your students have for comparing fractions?


Saturday, April 27, 2013

How a second grader got me to stop teaching and start listening

 Last year, I had a second grader who came in having no concept of subtraction.  In my beginning of the year assessment, he could not answer questions such as 7-6 = or 10-5.  After a great deal of work on conceptual development and hands on practice, he was doing a great job with his subtraction facts.  Except for some of the most challenging "facts" that our program teaches as the up to 10 facts.  (basically a teen number take away a 6, 7, 8 or 9.  Despite repeated attempts to "teach" this student "how to do it" he just wasn't making any progress.  After backing off on "teaching him how to do it" for a few weeks and doing more exploring of lots of different solution strategies with other students, he suddenly could answer all of these types of questions and the best part was that he was doing it fluently.  Could he explain the up to 10 strategy to me?  NOPE!  He invented a strategy of his very own, and I think he had been doing it all along.  I think my teaching him to do it my way was all symbolic to him and gave no meaning to the problem.  Let's take a look at his strategy and see how he has used it as he has moved into grade 3 and more complex subtraction problems.

At the Fact Level

This is where this student first invented this strategy.  See the picture below for this example (17-8) He sees a number such as 17 as a ten and seven ones.  GREAT!  He knows he has to take away 8 ones.  He says to me, there isn't enough ones to take away 8, so I am going to take the 8 ones away from the ten.  That leaves me with 2 plus the 7 ones I ignored.  2 + 7 = 9.  He does all this mentally and fluently!!!  He is able to explain his thinking to me in a clear and concise manner.

Another example: 15-7.  You can't take 7 ones away from five ones so take7 ones away from the 10. That leaves 3 ones left from the ten plus the 5 I ignored.
I can't tell you how much of a breakthrough this was for him (and me!)  I really wonder how long he had been solving problems this way and I was thinking he wasn't doing them right!  Did he try to explain this to me before-hand and I told him it was the wrong way to do it?  I don't know.  I do know that a current second grader has been solving problems like these the same way!  How many years have I had kids doing this without even realizing, or acknowledging their strategy?

Taking it up to the next level

By the end of grade 2, I was working with this student on a lot of 2 digit minus one digit type problems like the ones shown below.  To my surprise (and delight) this student extended his fact strategy and it worked very well for these types of problems.

Look at the example of 23-7.  "I can't take 7 ones away from 3 ones so I am going to ignore the 3 for a minute and take 7 ones away from 20 which is 13.  Now I put the 3 I ignored back with the 13 and that is 16."

Did you follow that?

Another example.  42-8. "I can't take 8 ones from 2 ones so I am going to take 8 ones from 40, which is 32.  Then put the 2 back I ignored and it is 34.

 Of course, this student does these problems mentally and writes down just his answer.  The horizontal number sentences you see off to the side are just my notes about his strategy.  This kid is a tier 3 kid in math and needs a lot of intervention.  It is pretty amazing that he invented this strategy and that it works so well. 

Moving onto the very end of grade 2 and a lot of grade 3 is more multi-digit subtraction.  When we began working on 2 digit subtraction, he continued to use his strategy.

In this example, he says "I can't take 46 away from 2 ones but I can take it away from 80.  80-40=40 then minus 6 more is 34.  When I put back the 2 I ignored, it is36."

Three digit computation

Here is a look at how he uses his strategy with 3 digit numbers.  See picture below.  The red example is 138-79.  He takes 79 from 100, leaving 21 and then puts the 38 back and gets 21 + 38 = 59.  Still doing these completely in his head.
Another example.  Take 176 away from the 200 which leaves 24.  Put the 40 back with the 24 and that is 64

The Pinnacle of Third Grade Subtraction

As we head towards the end of his third grade year, we have been spending time with four digit subtraction. I was thinking he would abandon his strategy on this but it actually works quite well for him even with very large numbers.  Take a look at the picture below. 5350-1995.  Wow.  This is a problem I see much older students getting wrong all the time.  This student did it in under 30 seconds without using a pencil or writing anything down.  "5000-1995 is like 5000-2000 but then you have to put 5 back so it is 3005.  Then I add back the 350 I ignored and it is 3355." Wow!  Did you follow that?  Isn't that a great way to do this problem mentally?

This is traditionally seen as a triple borrowing problem and causes kids a lot of headaches.  The traditional algorithm can get messy and kids really need to understand what they are doing when they do all that borrowing.  This kid's strategy uses place value and combinations of 10 and 100 and can all be done mentally!

The big take away from working with this kid for me has been stop trying to teach strategies and let kids invent them!  This gives them ownership of their learning and helps them develop really strong conceptual understandings that will take them a lot farther than learning a trick.  See how his idea works for all subtraction problems?

Have you ever had a hard time understanding a student's strategy?  What did you do about it?  Please share in the comments section below! 

Share and Compare Book Review

Have you read this book?


It is Share & Compare by Larry Buschman.

I have heard this book mentioned over and over again at workshops and other teachers always say that I should read it because it reminds them about my ideas around problem solving.  Well, spring break gave me the perfect opportunity to dig into this book.  I can see why it is so highly recommended.

In the early chapters, he sites a lot of research about how teaching kids problem solving strategies (especially kids under grade 3) does not do much to improve students' abilities to solve problems.  I have found the same thing in my own practice.  I used to spend at least one day a week teaching kids how to solve problems.  It always seemed like it was working until I would give them a new problem that was not similar to one I taught them how to do.  He also sites a bunch of research that has found that kids are quite capable of inventing their own ways to solve problems.  Over the last 5 years, this is the direction my own practice has taken and it has made a huge difference in my students' ability to be good problem solvers.  I really had to stop teaching and start listening in order to make this change.  I am so impressed with the ways kids invent to solve problems if  you let them.

In chapter 2, there is a great discussion about how to teach problem solving strategies and how they should be taught as additional ways to solve problems as opposed to the only way to solve problems.  The author recommends holding off on direct instruction of problem solving strategies until after grade 3.  In my own school, this is the direction we have headed in as well.  In grades K-3 we spend a lot of time sharing kids strategies and talking about which ones are most efficient for which problems.  By holding off on teaching strategies, kids are really able to solve new and unusual problems on their own.  I hear a lot less of kids saying "I don't know how to do this."  We do teach a few strategies by the end of grade 3 such as making organized lists, and organized guess and check if they don't come up as kids invented strategies.  The level of problems we get to sometimes requires more organization to a solution and this is really the only part we have to "teach."

Chapter 2 also is filled with lots of examples and dialogue between teachers and students.  If you have not tried this approach to problem solving before, there are some great insights in this chapter.

The later chapters detail the structure of share and compare lessons.  They start out with a warm up which is often mental math and gives kids practice in some underlying skills that they might need to solve the day's problem.  The kids solve the problems on their own and share their answer with a partner.  We do this all of the time in my school and it is VERY effective.  I find it especially effective if students who share with a partner are responsible for explaining how their partner got the answer!

The second part of this model is the problem of the day.  This is the main problem solving task that kids are asked to complete.  The author discusses where his problems come from and gives some great examples.  Kids have about 20-30 minutes to solve the problem using any materials, manipulatives, drawings or a combination to figure out an answer.  They are then responsible for showing and telling how they got their answer.  I love the idea of kids showing and telling (in words) how they got their answer.  It is a great way for them to practice talking about their solutions and a great way to integrate writing across the curriculum.  This is an area I will be working on with my students for sure!

The third part is the Mathematicians Chair where students get to share their solutions with the class.  It is the teacher's job during part 2 to select students to share in the mathematicians chair that have the types of solutions you want your kids to be thinking about and comparing.  In my school, we have done more and more sharing of students' solutions each year but we do not currently use a Mathematicians Chair.  I think this will be something I would like to do.  We have the space for it and it would add a fun twist to kids' sharing.

The final part is Compare.  This is where students compare different solutions or methods of solving the problems and talk about how they are alike and different.  This is where I really like to talk about efficiency as well and figure out how efficient various methods were for the problem that day.  This is a very important step, so make sure you leave time for it!  I used to be very guilty of running out of time and not getting to this part, but now I make sure I get there even if I have to set a timer to remind me of when it is time to move on.

The appendix has some great ideas about using cartoons and children's literature to make problems.  There are a few I have marked to try out after spring break.  I think this book is definitely worth a read for anyone who teaches K-6 math.  It could help you develop or refine the way you present problem solving to your students.

I loved this book enough to head over to Amazon and look up the author.  It turns out there is a newer book by Larry Buschman called Making Sense of Mathematics. I decided to order it and will be writing a review sometime in the future!


What teacher books have you been reading?


Saturday, April 20, 2013

Using dice to promote fluency with additive reasoning


I work with kids from kindergarten right up through grade 6 and there is one activity that I do with kids in all grades.  It is simple, fast and very effective.  It is a simple dice game where kids are rolling and adding or rolling and subtracting.  There is not record sheets to copy or materials to prep and the kids love it.  If you want kids to keep a record of their rolls, it is quick and easy to have them make their own record sheet.  Let me take you from K up through the grades to see how this rolls out.

Kindergarten and Early/Intervention Grade 1

I use dot dice or my large foam dice and have kids start with 2 and roll and add them.  We add more and more dice as the kids are ready for more challenging numbers.  In the beginning, kids count each dot one by one.  As the year progresses, they start counting on and even adding two together before counting on the rest. 

In this picture are my over sized foam dice.  VERY ENGAGING for small kids, especially kids  who need more movement.  In this example, kids could count all the dice, count on from one number or do some combination of counting and adding.  Using the dot dice puts the game at a reachable level for all K kids.

Grade 1/Advanced K/Intervention 2

The next step in this game is to use the 1-6 numeral dice.  Same rules and regulations apply.  Students start by rolling and adding the 2 dice.  When they show proficiency with this, I change the game in one of two ways.  I have them roll and add with more dice (grade 1 common core has students adding 3 addends up to 20) or I have them roll 2 dice and find the difference.  

Here is the 1-6 numeral dice with a 5-10 numeral dice thrown in to challenge students.

Here is an example of a time where I wanted first graders to create a  record sheet to go with their game.  They just record the sum they got and draw a line on a small white board.  When they get that number again, they write it beside the first one.  I have used this simple record sheet idea over and over again at all these different levels of this dice game.

Grade 2/Advanced 1/Intervention 3

I start the year in grade 2 with a lot of work on the 12 sided dice.  I give each pair 2 and they do a lot of practice with roll and add and roll and subtract.  As they show proficiency at this level, I give them additional dice until they are rolling a small handful.  This is when they really begin anchoring on 10 and spend a lot of time moving dice around and making tens.
An example of a student rolling 5 12 sided dice.  They might pull the 8 and 2 together to make a ten and then the other eight and the two fours together to make 16 and then add 16 + 10.  All of this is done mentally and it bridges nicely into the work second graders have to do with multi-digit addition in the common core
 Next we move into adding some small 2 digit numbers.  I have a few dice with 2 digit numbers but have purchased a bunch of blank dice and made my own.
The next step for second graders is adding small 2 digit numbers with other small 2 digit numbers.  You can see in this shot, one of the dice is one I chose the numbers for.  I highly recommend hat teachers have a few bags of blank dice at all times.  You can custom make games for your students so easily if you start with blank dice
Followed by adding in more dice

Having 3 addends brings out all kinds of strategies!

And more dice......

You can see this student is grouping some of his dice.  The 15 +5 is a nice chunk that makes 20 and the 28 + 2 makes 30.  I see kids doing this (making friendly 10's) a lot as I add more and more dice.  Being able to roll and add this many dice is my goal for the end of second grade.

Another important second grade skill is counting mixed coins.  Do you see how these dice can keep kids practicing counting mixed coins?

Third and Fourth Grade

We continue to refine strategies for adding multiple 2 digit numbers mentally.  We play this game as a quick warm-up at the start of math classes a few times a month.  Sometimes we will add in a dice with 3 digit numbers on it to keep things fresh.  (It really helps to have a big bag of blank dice so that you can customize your games as you go!)

How would you find the sum of these 8 dice?

Grades 5 and 6

This game keeps on coming with more practice with additive reasoning but the numbers have changed a great deal by this point.  In our school (and in the common core!) there is a lot of focus on fraction and decimal operations at fifth grade and by the end of grade 6, I want them to be very fluent with these ideas.  Being fluent with fraction operations is a very important cornerstone to kids developing proportional thinking in middle school and manipulating fractions becomes very important as kids delve into algebra. I love using fraction dice with kids this age because it is a fun way to promote fluency.

Fifth grade students playing a simple roll and add game with a self made record sheet. 

Sixth grade students rolling and adding a variety of fractions.  As more dice are added, kids think more and more about combinations that make one.  This time the kids are playing with no record sheet

Fifth and sixth grade students work on adding a combination of fractions and decimals.  This game is also easily adapted to roll and find the difference

Kids who have been working with percents fractions and decimals roll and add all three types of dice.  It is very interesting to watch this and see which students think in decimals and which think in fractions


These games make great warm-ups in fifth and sixth grade and would also benefit plenty of older students!  One more version of the game I use with sixth graders is with my integer dice.  The common core moves some of the emphasis on integer operations up to seventh grade, but I find this dice game a nice match for sixth graders as well.  Especially those sixth graders who are really proficient with fractions and ready to try something new.  So sometimes while some sixth graders are still playing these games with fraction or decimal dice, I give these integer dice to kids who are ready for the next step.

Integer dice roll and combine

Do you use dice in your classroom to promote fluency?  How else do you use dice in your classroom?

Looking for more ideas?  Check out this post about how I use a set of seven dice to work on double digit addition and subtraction.  

Friday, April 19, 2013

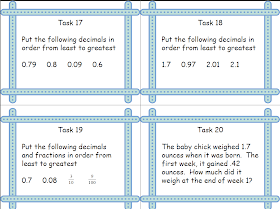
Decimal and Money Task Cards: Common Core Aligned for Grades 4 and 5

My fourth graders have just finished up their unit on decimals and money and as a treat for the day before spring break, I made them a set of task cards all about decimals and money.  They had a great time!


We played the scoot version of this game where the task cards are set out around the room and kids move around the room in any order they choose and complete each task card.  They don't have to go in order and the task cards are not laid out around the room in order.  (I have tried doing it in order and it creates a mess because kids work at such different paces!) For my very early finishers, I have a few blank task cards and I hand them one of these and have them create a task for their peers.  They also have to show me that they know the answer!  This helps to assure it is a task at a doable level for the kids in the group.

When more than a few students finish, I start pairing kids up with other kids who are done.  They then get to have a "math talk."  What that means is that they go over their answer together and on any where they disagree, they go back and find that task card and solve the problem together.  They do this until they agree on all of their answers.  Occasionally, I will need to step in and help them with a problem that they can't come to an agreement on, but it is pretty rare.  I also created an answer key so I can quickly check students work as they finish their math talk.


The papers of 2 of my students involved in a math talk


I love task card days because kids get such great independent practice and they think they are doing something really fun!  All the kids were very engaged, even though today is our last day before spring break!

Here are a few other ways I use task cards
- Track math: When the weather is nice, I love to head outside with kids and use our one eight mile gravel track for math.  Check out this post for more information.
- Warm-ups or transitions.  Put one of these task cards under your document camera and students can solve it as they are getting settled down for math class
- Formative assessment: Give one, two or more of these task cards to students to see how well they understood the concepts in your lesson.  This is a quick way to check in with kids and one of my favorite formative assessment strategies.
- Print and give for homework.  You can print one page at a time and give for homework as you move through your unit or send the whole pack at once with a longer due date.
- Review/games/test prep: These are a fun way to review for local and state assessments

Blank task cards for early finishers.  Having some of these on hands gives your early finishers something to do and kids LOVE creating things for their classmates!

These task cards are available in my Teachers Pay Teachers store.  Click here to go check them out!


How do you use task cards in the classroom?  Please respond in the comments below!

Common Core Standards for telling time and a fun game to help your students get there!

As we transition from our state standards to the common core, I keep hearing teachers ask, "Do we still have to do this" or "What grade is that in?"

One thing that hasn't changed for our state is when we need to teach telling time.  Here are the common core standards for telling time at grades 1-3

CCSS.Math.Content.1.MD.B.3 Tell and write time in hours and half-hours using analog and digital clocks.

CCSS.Math.Content.2.MD.C.7 Tell and write time from analog and digital clocks to the nearest five minutes, using a.m. and p.m.

CCSS.Math.Content.3.MD.A.1 Tell and write time to the nearest minute and measure time intervals in minutes. Solve word problems involving addition and subtraction of time intervals in minutes, e.g., by representing the problem on a number line diagram.

So grade 1 is time to the hour and half hour, grade 2 is time to the five minutes and grade 3 is time to the minute.

We have been working hard in second grade on telling time to the five minutes (and even some time to the minute thrown in there!)  What kids were still struggling with was when we gave them a blank clock and asked them to draw the clock hands for a given time.  The hour hand in particular was never in the right spot.    I wanted to give kids more practice with placing the hands on a manipulative based clock before going back to drawing hands on paper.  So I got out the mini geared clocks and some time dice I had on a shelf and made up a simple (but very effective!) game.


First I demonstrated with our large floor clock

The time dice get rolled and then students use their clock to build that time.  Here is a simple example


This game is great played with the whole class at first and also after they know how to play as a partner or center game.  Here is an example of what I was seeing on their paper practice and why I made this game

The time is 10:30.  Look at where the hour hand is placed on each clock.  A lot of my students were placing it where it is on the clock on the right; pointing directly at the ten!  This game has helped them so much with where to place the hour hand.
Examples like these when we played with the entire class brought forth great discussions about where the hour hand goes.  Now my students are paying attention to this detail.

Some of my students breezed through this game and were ready for more of a challenge.  I changed their dice so that they were playing to the minute.  Here is a look
Even though time to the minute is a third grade standard, many of my students were ready to go there.  This is such an easy game to differentiate!

We played this game as a whole class and with partners and then as a warm-up to math one day.  To make the leap from this game to pencil/paper type tasks, the final time I asked kids to play this, I gave them a sheet of blank clock faces to use as a record sheet and after they and their partner agreed on the positions of the hands using the Judy clocks, they recorded it on their record sheet.  

This morning, students were asked to do a similar task to the one that inspired this game and they did very well!   I will definitely be adding this game to my centers for the end of the year and will be using it again next year!

I also use these number puzzles to practice telling time and many other skills!


Here are some ways I get first graders to meet Common Core standards for telling time.

Here are some You Tube videos and songs I use when teaching time

What activities do you use to help your students learn time?